


Taking screenshots on Windows is helpful for saving content, fixing issues, or recording your screen. This guide covers how to capture, crop, and find screenshots on Windows 10 and 11 using built-in tools and shortcuts.
A screenshot is a digital image of your screen, used to save, share, or document what’s displayed on a Windows laptop or desktop in real time.
Taking screenshots is useful for capturing error messages, saving online content, or documenting steps during tutorials. It’s a quick way to record anything visual.
How to Screenshot on Windows?
PrtScn is the key used to capture your screen on Windows. It was copied to the clipboard and is pasted into apps like Paint or Word using Ctrl + V.

Step-by-Step:
- Press the PrtScn Key on your keyboard. It immediately copies the entire screen to your clipboard.
- Open any app like Paint, Microsoft Word, or even an email.
- Press Ctrl + V to paste the screenshot.
- You can then crop, edit, or save the file as needed.
This works across all versions, including Windows 10 and Windows 11.
How to Screenshot on Windows 11?
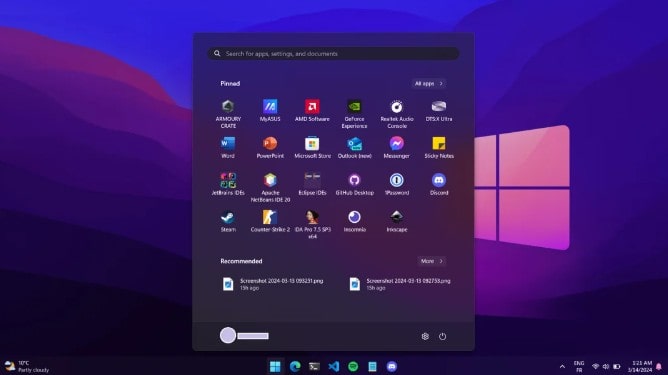
Windows 11 is built for quick screenshots using Win+Shift+S to snip, Win+PrtScn to save full screen, Alt+PrtScn for window, and Win+G to capture games.

Keyboard Shortcuts:
- Windows + Shift + S – Opens the Snipping Tool overlay with four snip options.
- Windows + PrtScn – Captures and saves the full screen to your Screenshots folder.
- Alt + PrtScn – Takes a screenshot of just the active window.
- Windows + G – Opens the Xbox Game Bar, which includes options to take screenshots and screen recordings.
How to Screenshot on Windows 10?
Keyboard Shortcuts:
- Windows + PrtScn – This shortcut captures the full screen and automatically saves it as a PNG in Pictures > Screenshots on your device.
- Windows + Shift + S – This opens the Snip & Sketch tool, letting you snip a rectangular area, window, freeform shape, or the full screen instantly.
- Alt + PrtScn – Pressing this captures only the active window and copies it to your clipboard — just paste it into Paint or Word to save.
Built-in Tools for Screenshots in Windows 10:
- Snip & Sketch – Press Windows + Shift + S, select your snip type, and use built-in editing features to crop, annotate, and save the image easily.
- Snipping Tool – Still included in Windows 10, this classic tool lets you select from freeform, rectangular, window, or full-screen snips and save them manually.
Easy Keyboard Shortcuts to Capture Your Windows Screen
Taking a screenshot on Windows is simple. The key used is PrtScn (Print Screen), and the methods vary slightly by version. Screenshots are either copied to the clipboard or saved to a folder, depending on the shortcut used.
| Shortcut Key | What It Does | Works On |
|---|---|---|
| PrtScn | Captures the entire screen and copies it to the clipboard | Windows 10 / 11 / Laptop |
| Windows + PrtScn | Captures full screen and saves it to Pictures > Screenshots | Windows 10 / 11 |
| Windows + Shift + S | Opens Snipping Tool overlay to snip a part of the screen (copies to clipboard) | Windows 10 / 11 |
| Alt + PrtScn | Captures the active window and copies it to the clipboard | Windows 10 / 11 |
| Windows + G | Opens the Xbox Game Bar to capture screenshots or record the screen | Windows 10 / 11 |
| Snip & Sketch | Launches via Windows + Shift + S for cropping, drawing, and saving a screenshot | Windows 10 |
|
Snipping Tool |
A classic screenshot tool to capture any area, still included in Windows 10 and updated in Windows 11 | Windows 10 / 11 |
| Alt + Right Arrow | Moves forward in navigation (browser, File Explorer, etc.) | Windows 10 / 11 |
| Alt + Shift + Arrow Keys | Moves a focused tile or item in the Start menu in the selected direction | Windows 10 / 11 |
If the PrtScn key doesn’t work alone on your laptop, try pressing it with the Fn key.
Free Third-Party Screenshot Apps for Windows
While built-in tools like Snipping Tool or Print Screen are great for basic use, many users need more advanced options. If you want to take scrolling screenshots, add annotations, or save files automatically to the cloud, third-party apps offer more flexibility.
These tools work well on both Windows 10 and Windows 11 laptops, and they come with extra features like custom hotkeys, image editing, and screen recording. Below are some of the most popular and reliable screen capture tools:
- Lightshot – Simple, lightweight, and perfect for quick screen grabs with instant sharing options.
- Greenshot – Free and user-friendly, ideal for capturing and annotating content for work or school.
- ShareX – Feature-rich and open-source, with options for scrolling screenshots and automation.
- Snagit – A premium tool designed for professionals who need video capture, tutorials, or detailed image editing.
These apps help you go beyond basic screenshots, making them useful for creators, gamers, and office tasks on any Windows laptop.
How to Crop a Screenshot on Windows?
You can crop screenshots easily on Windows laptops using Snipping Tool, Snip & Sketch, or Paint without needing any third-party editing apps.
Cropping is useful when you want to remove unwanted parts of the screenshot and highlight only the essential section. Here’s how you can do it:
Using Snipping Tool or Snip & Sketch
- After taking a screenshot with Windows + Shift + S, a preview thumbnail appears in the corner.
- Click it to open the built-in Snip & Sketch editor (or Snipping Tool in Windows 11).
- Use the crop icon to trim the image to your preferred area.
- Click Save As to store the final cropped version in your desired folder.
These tools are perfect for quick editing, annotation, or cropping right after the screenshot is captured.
Crop Using Microsoft Paint
- Open Paint by searching for it from the Start menu.
- Press Ctrl + V to paste your screenshot if it was copied using PrtScn.
- Use the Select tool to highlight the part of the image you want to keep.
- Click the Crop button in the top menu.
- Save the cropped image as a new file or overwrite the original.
Microsoft Paint is ideal for simple edits and cropping on all versions of Windows laptops and desktops.
Where Are Screenshots Stored on Windows?
Screenshots on Windows are saved in Pictures > Screenshots, clipboard, or Videos > Captures, based on the shortcut or tool you used to take them.
- Windows + PrtScn: Auto-saved in Pictures > Screenshots.
- Snipping Tool / Snip & Sketch: You must manually save to a folder after editing.
- PrtScn / Alt + PrtScn: Copied to the clipboard — paste into Paint or Word, then save.
- Windows + G (Game Bar): Saved in Videos > Captures.
To locate your screenshots, open File Explorer and check the Pictures or Videos folder based on the method used.
Now you know how to screenshot on Windows using multiple methods, including keyboard shortcuts, the Snipping Tool, and Snip & Sketch. Whether you’re on Windows 10 or Windows 11, you can capture your full screen, an app window, or just a section, and easily crop and save it.
Screenshots are essential for work, school, or sharing. Once you learn these shortcuts, taking and managing screenshots becomes second nature.
FAQS
What is the shortcut for a screenshot on Windows 10 and 11?
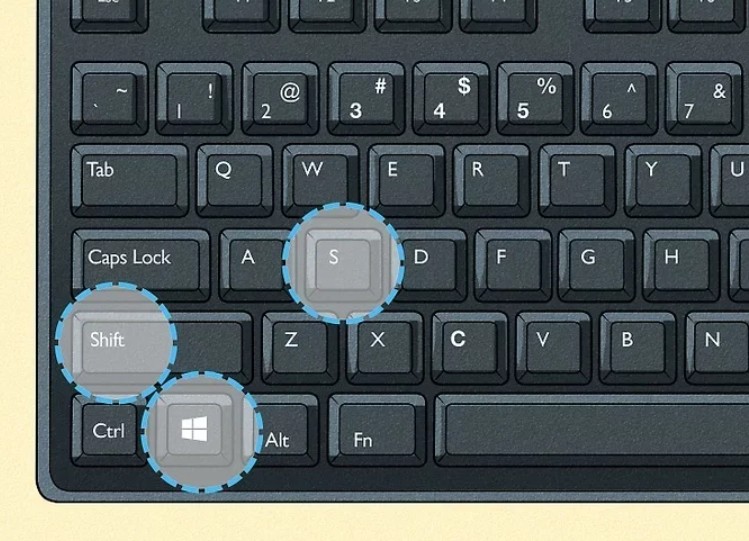
The shortcut is Windows key + Shift + S to open Snip & Sketch.
How to capture only the active window on Windows?
Press Alt + PrtScn. This copies only the currently active window to the clipboard.
Does Windows have a built-in screenshot tool?
Yes, both Snipping Tool and Snip & Sketch are built-in tools in Windows.
Where is the Print Screen key on my keyboard?
It is usually labeled PrtScn, PrtSc, or Print Scr. It is located near the top-right corner of most keyboards.
Can I take a scrolling screenshot on Windows?
Not natively. Use third-party tools like ShareX or PicPick to capture scrolling content.